Saturday 29 November 2014

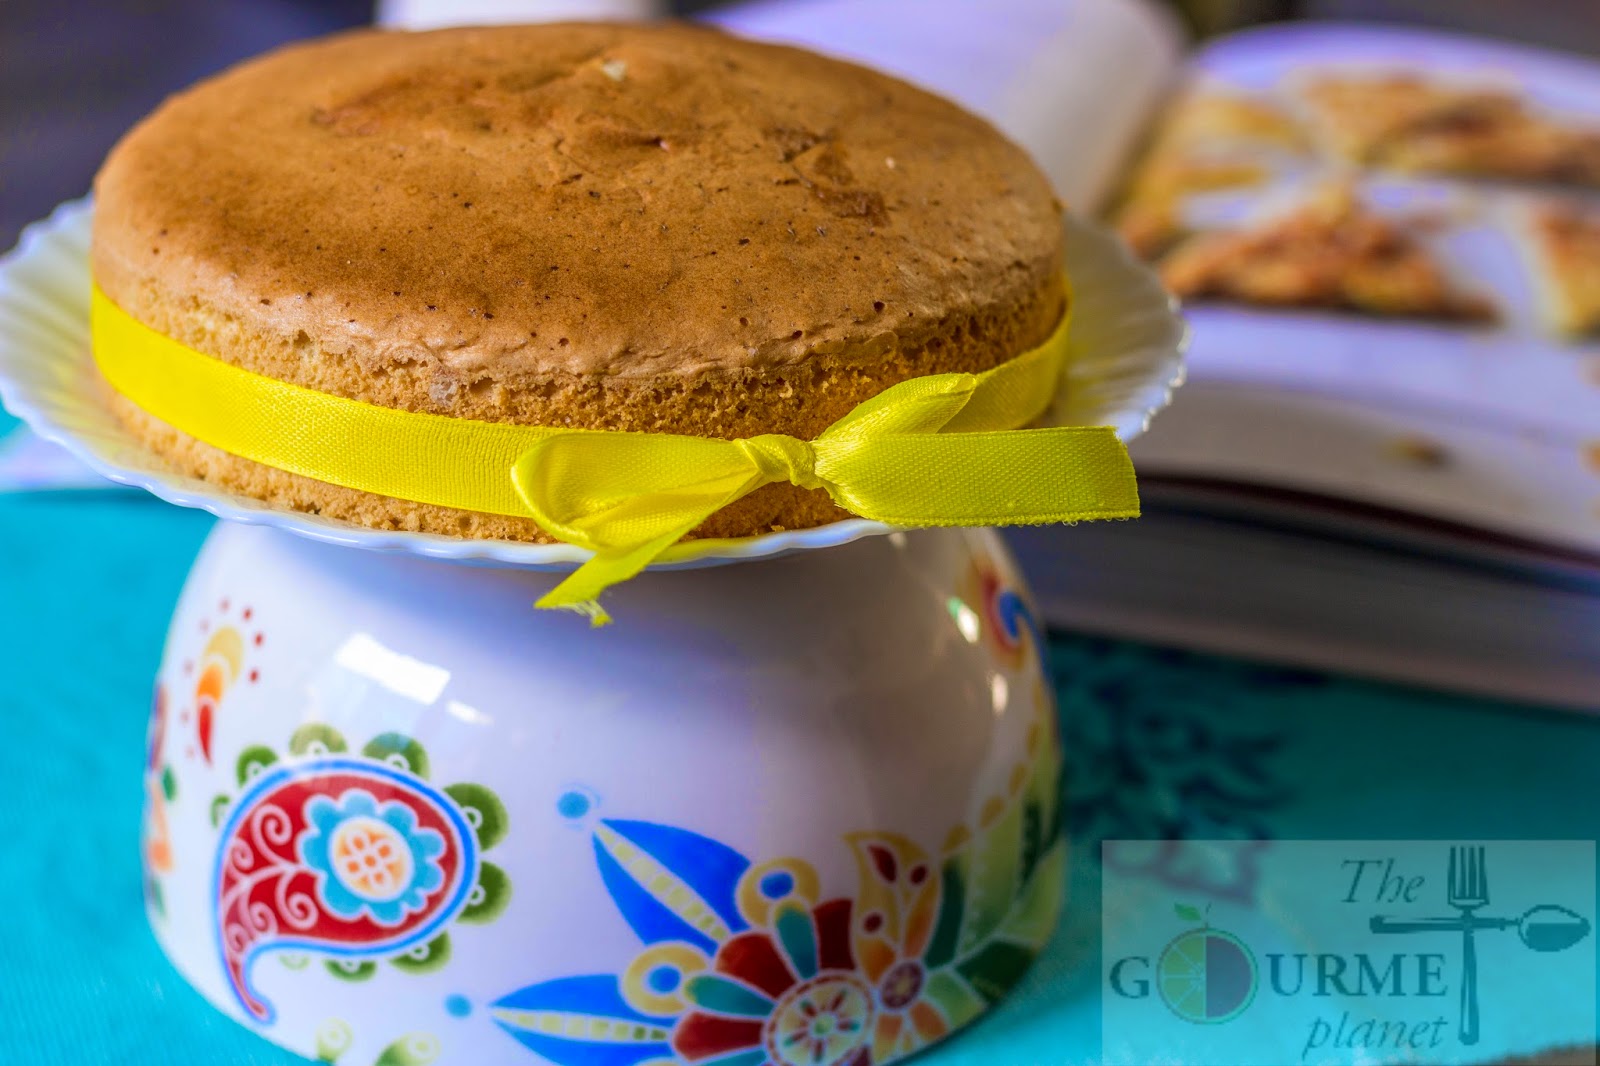
Fresh Fruit Cake...a pleasant Birthday surprise for your loved one!

This is a very special post and yes of course for my someone special...my little nephew who turned 4 a few days back! For long i had been thinking to do something exciting on his birthday but couldn't really assimilate courage to venture what i had actually thought of. So this time i didn't give in to my fears but attempted an ever so tasty and delicious Fresh Fruit Cake for my little one. 

Cakes are not a very regular affair in my kitchen coz of the time and dedication it requires. This was my second attempt at creamed cake and Bang-On!! I was amazed at my creation..superbly yum..and filled with goodness of cream and fresh fruits!
A Birthday cake is an integral part of the birthday. I think 'Birthdays are Nature's way of telling to eat more Cakes!' Nothing can replace the joy you feel from seeing children's faces light up when they see their birthday cakes for the first time – this is a truly priceless sight and my version of simple fresh fruit cake can help make this happen for you and your kids, right in your kitchen!
Ingredients:-

For Cake
1 - Vanilla sponge cake (Check the recipe here
150 gms - Whipping cream for creaming
150 gms - Whipping cream for frosting
80 gms - Icing sugar
3 tbsp - Strawberry filling (Used a market one. You could use Strawberry jam instead)
3-4 tbsp Sugar syrup
4 tbsp diced pineapples (small sized)

For Decoration
Grapes - cut into halves
Oranges (Keenu) - cut into quarters
Kiwi - cut into circles
Pineapples - cut into strips
Chocolate morsels - handful 
Roasted Almond slivers - fistful 

Steps to follow:-

1. Cut the vanilla sponge into 2 layers

2. Take whipping cream and icing sugar to it and whip till light, fluffy and soft peaks are formed. (For creaming)
> For the filling the cream should be slightly stiff in texture.
> For the frosting, the cream should not be very stiff but a little soft in texture with stiff peak still getting formed.
3. With the help of a brush, soak the bottom cake layer with the sugar syrup generously
4. Take a dollop of strawberry filling and spread it evenly over the cake.
5. Now spread the whipped cream and add finely chopped pineapples on the cake
6. Over the diced pineapple pieces put the second cake layer on top.
7. Apply sugar syrup and start with crumb coat (creaming).
8. Refrigerate for 1 hour so that creaming is set
9. Once the creaming/filling of the cake is set its time to frost the cake.
10. Now take some whipped cream (soft in texture) on a palette knife and cover the top layer of the the cake and sides
11. Smooth-en out the sides and the top of the cake.
12. Now move the cake onto the cake board and pipe with beautiful designs and decorate with kiwis, oranges, grapes, pineapples and chocolate morsels and cover the sides with almond slivers. (As depicted in the pic below or in whichever way you like)
13. Refrigerate the cake and take it out 30 mins prior to serving for it to get to room temperature.


Thursday 27 November 2014

Besanwali Bharwan Mirch | Spicy stuffed jalapenos

Its the best time of the year! Certainly not coz of the climate but because of the plethora of gorgeous vibrant flowers and the variety of greens available for my kitchen! Winter greens are healthy, nutritious and so versatile. One could do so much with it. Innovate & cook.

Any kind of condiment with my food is an indispensable part of our meals. A spicy dip or a kachumbar salad enhances the flavors. A lot of time even a homemade ghee is handy! Winter season is a season of pickles, chutneys and green chillies with spicy stuffing! Takes a simple meal to a different dimension all together.

While i was doing my weekly grocery and vegetable shopping, i caught hold of some bhavanagri hari mirch/green jalapenos which are so multifaceted. Stuff them with mashed potatoes or spicy keema mixture and deep fry them, they make an awesome delectable finger food. Cut them in chunks and spice them, makes a perfect pickle accompaniment for your one pot meals or just stuff them with roasted gram flour and you will get a perfect match for your parathans. 

A not so fiery yet delectable combination of green chillies and spices make this a right accompaniment, which stands out for its simplicity and intrinsic flavor. The recipe uses simple spices which are handy at home. Store them in an airtight container and put them in the fridge to be consumed later. I am sure you are going to love this spicy treat as its very very easy.
 Ingredients:-

1 cup gram flour (besan)
8 Green jalapenos (badi hari mirch)
3/4 cup water
1/2 tsp turmeric
2.5 tsp dried mango powder (amchoor)
1 tsp grated ginger
Salt to taste

Tempering
1/4 tsp asafoetida (hing)
2 finely chopped green chillies
1 medium sized finely chopped onion
3 tbsp Oil 

Roughly pound in mortar & pestle:
1 tsp coriander seeds
1/2 tsp fennel seeds (saunf)
1 tsp cumin (jeera)
1/4 tsp carrom seeds (Ajwain)

Steps to follow:-

1. Slit the jalapenos lengthwise from one side and scoop out the seeds (chop the scooped out content finely and keep it aside)

NOTE: Do not throw the seeds away. They will be used for stuffing.

2. Heat oil in a wok and throw in the spices in 'Roughly pound in mortar & pestle' and saute.
3. Now one by one add the items mentioned under 'Tempering' , grated ginger and the seeds scooped out from jalapenos.
4. Add salt, turmeric and amchoor powder.
5. Now add besan and vigorously saute till the besan becomes fragrant.
6. Add water slowly and keep stirring so that no lumps are formed.
7. The besan mix should not be lumpy but smooth and should be dough like .
8. Let the mixture cool and later fill the slit jalapenos with this mix with soft hands else you will end up breaking the jalapenos.
9. Once all the jalapenos have been filled, pan roast them in a broad pan until cooked from each side.

NOTE: Use 2 tsp oil for pan frying and keep the flame low. You will need to keep a constant watch else they would burn. The jalapenos would be ready in 10-15 mins. 

Tuesday 25 November 2014

Gajrela | Gajar Halwa or Carrot pudding, a North Indian sweet delicacy

Every one has good memories and moments to cherish lifelong. Especially, if those memories are from your days of childhood, then  who doesn't crave to live those moments once again !! 
Winter is here and reminisce my childhood days when we used to enjoy one month winter break. Respite from the monotony of school and the mundane schedule.

Winter vacation was all about picnics with family, interesting hobby classes and sumptuous Kumaoni food, which we ate together while sitting in our balconies under the sun.Winter is a season of Lazy months. Cladded in woolens we all hate to move out from the warm and cozy layers of our blankets. Strangely at this time of the year even our eating habits suddenly turn upside down. From home made delicacies with extra layer of butter to the greasy items like halwas of different types, pakoras, samosas and stuffed parathas. Parathas stuffed with mashed potatoes, radish or cottage cheese tops the hitlist in these months.
When i talk of winters i cant miss mentioning my all time favorite 'Gajar Halwa' cooked by my mom. Delicious in taste and very addictive. Its from my mom that i have inherited an inclination towards cooking. Mums are outstanding cooks! My mom's cooking has always been experimental, innovative and absolutely random and she always told me that food cooked with love can never go wrong. Now when i have taken over this task completely, i know what she meant.

Winters are here and there are time when i return from office and feel the urge to eat something sweet. I miss my ma's homemade love. She would always cook loads of halwa, store in the freezer and serve hot whenever we kids troubled her with our dessert pangs ! Today is again one of those days when i crave for 'Maa ke haath ka halwa' but alas! Plight of a married daughter. She has to manage her cravings on her own! 

Determined to savor some warm traditional winter sweet, i stopped by my local grocery stop and grabbed some carrots. 45 minutes quick work from grating to plating, all was set! Gajar halwa is my husband's favorite too and i was happy to see the shine in his eyes when he smelt the aromas. One bite and he was blown away. Aaaah! I loved what i cooked and my cravings were certainly gratified, but yes, i am still waiting for my mum's version because that has to be nothing but DIVINE !
Ingredients:-

380 gms - Grated Carrots
380 gms - Full cream milk
100 gms - Sugar
2 tbsp - Ghee (Clarified butter)
1/2 tsp - Cardamom powder
3 tbsp - chopped almonds
3 tbsp - chopped cashews
4 tbsp - raisins

Steps to follow:-

1. Heat a wok and put some ghee.
2. Keep the flame low and add grated carrots. Saute them for 3-4 minutes on a low flame.
3. Add sugar and mix vigorously and till the sugar melts and caramelizes well. This will take 5-6 mins.
4. Now add milk and give a good stir !
5. Add cardamom powder and lid the pan for 7-10 mins on a low flame so that the carrots get cooked. Keep stirring intermittently. 

NOTE: You are recommended to use a non-stick wok/kadhai.

6. Unlid the pan and add the chopped nuts and raisins and now let the halwa cook on a low flame
7.  Halwa is ready, once the milk content has reduced fully and has become of khoya texture.
8. Serve hot with pistachios and almond slivers.

Variations:

1. You could also use heavy cream to get a more creamy khoya content. Reduce milk content to 250 gms and use 2 tbsp heavy cream (brand: Amul)
2. Instead of adding raw nuts you can pan roast the chopped nuts in 1/2 tsp ghee and then add to the halwa after is pan is unlid.
3. At times i also add 1/4 tsp rose water as it gives sweet fragrance to the dessert.

Sunday 23 November 2014

Corn & Fenugreek Rolls...Apt accompaniment to my winter evenings!

Sunday evenings are relaxed. If its winter season then for sure after an afternoon nap, my husband and i curl up in a warm blanket in our living room and watch our favorite movie. My best time! 

So last Sunday had been a hectic affair. Too much of cooking happened in my kitchen and by the afternoon i was half dead.  I had already planned a simple dinner, a bowlful soup with some homemade garlic bread. Yes, so now you know what got me so tired. Sunday was all about baking. A fresh fruit cake (which will be coming in soon) and then a garlic bread. Aaaah! A yummy tummy weekend for me and P. 

I had made some food preparation for our evening movie time as well. Yes, Of course! I know, i am incorrigible. After so much whole day work, i couldn't resist making some snacks for the best time i look forward to spending with Mr.P.

Since long i wished to use fresh methi leaves in deep fried rolls. I had freshly bought produce from the market and before i could use it in my aloo-methi, i thought to innovate! So i caught hold of some frozen corns and paneer and just made a delicious roll, different yet delicious. A lightly spiced fried roll along with some curry leaves dip came out as an apt evening snacks for winters. Swathed in layers of quilts, my P and i simply loved them with ginger tea and lost the count of how much we ate. 

A Sunday full of baking activities, an evening with my love and a hearty light meal. Who says that only fancy stuff can be alluring. You need to have an eye for the best! Such a perfect Sunday, well spent with my two favorites, my P and kitchen lulled me to a contented peaceful sleep with no worries of Morning morning blues!
Ingredients:-

1 cup Fresh Fenugreek leaves (washed & very finely chopped)
3/4 cup Cottage cheese (crumbled)
1 cup sweet corn kernels
2-3 green chillies
1 tsp red chilli flakes
1 tsp minced ginger
1/4 tsp black pepper
1/2 tsp garam masala 
5 tbsp maize flour
2 tbsp rice flour
Oil to deep fry
Chaat masala to sprinkle

Steps to follow:-

1. Wash the fenugreek leaves and chop them very finely. 
2. Remove the excess water from the leaves by pressing the leaves in batches between your palms. Keep it aside.
3. Blanch the sweet corn kernels and strain it, to remove the excess water.
4. Whiz the sweet corn kernels roughly.

NOTE: You don't have to make a paste here. Just roughly blitz them.

5. Mix all the ingredients (except oil and chaat masala) and roll them into cylindrical shape.

NOTE: Only if you feel the mixture is dry, then add water drop wise else as per my recipe the water from the washed fenugreek leaves will suffice.

6. Heat oil in a pan for deep frying.
7. Deep fry until crisp and golden brown.
8. Transfer them on paper napkins to remove excess oil. 
9. Sprinkle some chaat masala and serve hot with tomato ketchup or any green chutney along with coffee or ginger tea.
 
Isn't this a simple yet a perfect evening snacks for those breezy winter evenings, when you sit down by your terrace and watch the sun go down and listen to chirping of the birds while they flock back to their nests, calling it a day!
Have a sumptuous snacker evening! 
Cheers.. :)
 

Friday 21 November 2014

Dal Bukhara...aka Makhni Dal | A replica of restaurant style

Butter and cheese are my two favorites! Sinful!!..Yes..i don't care sinning if its them! A bowlful of soup with a dollop of butter and a creamy pasta with loads of cheesy surprise in it are enough to get me happy and chirpy. :) 

Looking at me, people will surely think that i am very diet conscience person, but no, its not the case AT ALL!! Its only when there's a family wedding when i feel the need to worry about those extra kilos else 'I don't care'. How can anyone neglect food..good food!!!! So this weekend was all about food..i mean lip smacking delicious 'calorie' loaded food, and we both loved it. Mr.P is a bit anxious about oils and butter but he seems to be carefree if my signature style Dal Makhni is on the menu.

My style recipe of 'Dal Makhni' truly lives by the name 'Makhni' and yes its heavily loaded with all that you can call sinful. Butter and cream! Makhni gotta be nothing but makhni, so no healthy oil options or Nutralite for my gravies pls!

If you want a restaurant style Dal Makhni or Maurya's patented style 'Dal Bhukhara' then follow my recipe exact and do not hesitate even if you think it will add to the few inches.  Its absolutely easy, take my words for it. I make it especially for my P and he loves it every-time. He is the reason why i have actually perfected this dish. Its his all time favorite. 

P.S. Do not get intimated with butter quantity pls!! Heaven's sake, its MAKHNI after all. :) Pure sinful indulgence..totally homemade!

Ingredients:-

1 cup Whole Black gram lentils (Sabut Urad Dal)
1/2 cup Kidney beans (Rajmah) 
1 tbsp ginger garlic paste
1/2 cup Tomato puree
1 cup Milk
1 tsp Garam Masala
100-120 gms Butter (Amul)
1/2 tsp red chilli powder 
1 small black cardamon (deseeded, seeds powdered. Do not discard the shell. You can use it next time while pressure cooking some other dal.)
Salt to taste

Steps to follow:-

1. Mix whole black gram and kidney beans and soak in water overnight.
2. Pressure cook dal with ginger garlic paste and some salt up-to 3-4 whistles.
3. Once the dal has been cooked, add some water (1-1.5 cups)  if the dal has become to dry. 
4. Unlid the pressure cooker and leave it on a simmered flame.
5. Add the milk, puree, butter to the cooked dal and let it cook in a low flame for 20 - 30 mins.

NOTE: Cooking for 20-30 mins will allow the dal to absorb all the flavors and its the simmering on the low flame which adds to the dal makhni flavor.

6.  Once the dal has thickened a bit, add garam masala, salt and powdered seeds of black cardamom.
7. Serve hot with tawa naan, some spicy Kadhai Paneer and a bowlful of dal topped with a dollop of makhan.

Variations:-
1. While pressure cooking the dal, you could add whole spices (cinnamon, black cardamom, clove) as well.
2. Incase you wish to add some onions to my recipe, you could do it by adding one finely chopped, pan fried onions to the cooked dal along with tomato puree and milk.
3. 1/4 cup of heavy cream can also be added to the recipe and then you can reduce the quantity of milk if needed.

So you too can win the hearts of your loved one. Cook it with love and you will master it for sure.

Wednesday 19 November 2014

Basic Vanilla Sponge Cake..Tender and Deliciously moist sweet delight!

Practice makes Perfect! An old idiom which most of have heard at least once for sure from our parents while solving those tricky arithmetic problems or physics numerical. Blah!! But it just doesn't end there. As we grow we realize that to excel in our streams we need to have the determination and that constant practice to prove our skills. I remind myself everyday when i get bogged down my pressures and failures.

I love to bake and baking is a not tough but a tricky science! To master it well, it requires practice, practice and enough practice. Baking is like a love affair. Put in the right effort and ingredients and everything is wonderful. But be lazy and take shortcuts and the whole thing can go off the rails. I have spoiled enough cakes in past but i was always determined that sometime i will succeed. Yes, i did it and did it well! Happy Me!

My basic vanilla sponge cake recipe is extremely easy. All it needs apart from the aforementioned ingredients is LOT of Love and Care. Take my words for it. While baking, these are main heroes which render the goodness in the cakes. I am never in a hurry when i bake, i give my complete time to it. So you also ensure while you bake a cake next time, this one or any other recipe, you bake it wholeheartedly. Surely, it will be a perfect bake!

So if you have some unannounced guests at your home and you need to please them with fresh baked cake, then this can surely be your savior! My version of sponge cake can be used as a tea time cake with some vanilla or ganache frosting on it or can be the base cake for pineapple cake or fresh fruit cake. 
 

Ingredients:-

60 gms Castor sugar
3 whole eggs (at room temperature)
80 gms Flour (Maida)
1 tsp Vanilla extract
1/3 tsp 0f lemon juice
Pinch of salt 

Steps to follow:-

1. Preheat the oven to 180 degree Celsius.
2. Grease a 6'' diameter round cake tin with butter and dust with flour and place on a baking tray.
3. Take a bowl and beat the eggs, sugar with the help of a stand mixer or hand whisk until the sugar has dissolved completely and the mixture is light and fluffy.
4.  Pour in vanilla extract, lemon juice and a pinch of salt and give a final whisk.
5. Add the flour in batches and fold in gently in the egg mix.
6. Fill in the cake tin and bake at 180 degree Celsius for approx. 30 mins or till the tooth pick comes out clean when inserted in the center of the cake.
7. Turn of the oven and let the cake stay inside for another 5-10 mins.
8. Remove from the oven and let it cool down completely before cutting
9. Cut into slices and drizzle some chocolate syrup topped with some nuts or you can use the complete sponge for making cream cakes for celebrations.

Monday 17 November 2014

Poha | A perfect breakfast with flavorsome moistened rice flakes

I cannot compromise with food and its tastes. It has to be utterly good. Even the simplest of recipes get a twist in my kitchen and undergo a complete overhauling.Aaah!! That's me! Food is sacred! Its taste has to be nothing else but BEST!

Healthy food sounds so boring, isn't it? Yes they do, but its up-to to us to make them taste good, look attractive and at the same time maintain the health quotient. Pohas, a dish from Maharashtra is a much-favorite perennial breakfast recipe at my home. Light, healthy and totally yummy to the core.
 
The ingredients are very basic and easily available and the dish gets ready in less than 20 minutes. So for a hurried married working woman (which i am :P ), this dish comes out as a saviour. Saves time and at the same time pleases my Mr.P as well. Oh! He seems to have fallen in love with my Poha recipe now. And its only on his request that i make this at my place, which has become so often now. 

The fluffiness of moist poha and the burst of flavors - spiciness, tanginess and sweetness at the same time, take my version of poha to a different level all together.

Try it and you will for sure start making this often too.
Ingredients:-

2 cups - Rice Flakes (Chivda)
1 finely chopped onion
1 big sized potato (cut in cubes, blanched)
1/3 cup green peas (blanched)
5 tbsp - Peanuts 
1 green chilli (finely chopped)
1/4 tsp red chilli powder
1/2 tsp black mustard seeds
1/2 tsp Turmeric
1/2 tsp Coriander powder
1/2 tsp Garam masala
Salt to taste
Pinch of Sugar
Juice of 1 lemon
Oil for cooking
Sprig of curry leaves (chop the curry leaves, if needed)
Chopped coriander, for garnish

Steps to follow:- 

1. Thoroughly wash the rice flakes in a colander under running water and let it rest for sometime, till the excess water drains out.
2. Heat a wok and add some oil in it.
3. Throw in the black mustard seeds and curry leaves in the oil and let them crackle.
4. Add onions and green chilli and saute for 2-3 mins.
5. Now add chopped potatoes and blanched peas and let them cook for a min or two.
6. Add turmeric, coriander powder, red chilli powder and mix well.
7. Now mix in the moistened rice flakes and mix vigorously.
8. Add salt and garam masala.

NOTE: Poha should not be dry so incase you feel it is, add in some oil.

9. Lid for 2-3 minutes and simmer the flame.
10. In a separate wok, add 1 tsp oil, and add the peanuts.
11. Shallow fry the peanuts until light brown in color. 
12. Once done, unlid the pan and throw in the peanuts as well along with some chopped coriander.
13. Add some sugar and finally squeeze in the lemon juice. Mix well.
14. Lid the pan again and turn off the flame.
15. Serve after 5 mins topped with Haldiram's Aloo bhujia or besan sev.

 Poha makes a simple yet delicious breakfast accompanied with a hot ginger tea, especially in winter months. A light and healthy meal packed with nutrition from rice flakes and peanuts.

Thursday 13 November 2014

Kadhai Paneer | Cottage Cheese and Capsicum in spiced gravy

I love partying and i love it more if it is with my family, friends and loved ones. And if its a house party...Gosh! You certainly know what you talking about..It is maddening to the core, yes, Indeed. Its fun hosting a house party and for me its a big event. I leave no stones unturned in ensuring that my guests have good time. Theme party with fun games, good food, music and huge list of guests is my idea of absolute enjoyment. Spending some good time with your favorite people around breaks the monotony of a routine life. 

Planning a party is an event at my house. Oh..my Mr.P goes crazy with the shopping and the level of detailing i do for the preparations. Be it the theme, the lightnings, the decor, food or games and gifts. I patiently manages with his freaky wife! He knows for me its an occasion! Throwing a party is a great way to celebrate life and share happy moments. I enjoy every bit of it, even the next day when i spent most of my time cleaning the post house party storm! No regrets ever..
Mr. P becomes our official bartender for house parties and me as always the chef of the house! So this time. Both of us make a lethal pair when it comes to parties. Cooking, bartending and exquisite photography, all courtesy US! :)

Last weekend was one such party which i enjoyed it to the core and not to forget my guests love it! This time it was a bit hatke..an Indian theme, with Indian food, cocktails with desi twist and ethnic decor! Whaooooo...my guests were overwhelmed and so was i seeing them happy and enjoying to the fullest.

Food like every time has to be the BEST..no compromises pls! I hate to repeat a menu until its on a guests request else i always try new to lay new dishes or those which i have mastered. So this time for Indian theme party, on my P's request, i served Kadhai Paneer, which he claims to be the best and totally restaurant style. Mr.P is very fussy about food and the flavors and if the appreciation comes from, you better acknowledge it. So like an obedient wife (which i am totally ;) ) churned out an elaborate menu for the party, with hubby's help. Voila!! My guests loved it and my Kadhai Paneer turned out to be a hit! Aaaahh..the real pleasure is in seeing eyes filled with contentment and happiness.
Ingredients:-

215 g - Paneer/Cottage cheese, cubed
1 big sized Capsicum, cubed

1 medium sized onion - cut lengthwise, cubed 
2 small sized onion -  grind to a paste
1 tsp - ginger garlic paste
2 tsp - kasuri methi
1/2 cup tomato puree
3 - green chillies, slit lengthwise
1 tsp - Cumin seeds
1 tsp - lightly roasted coriander seeds
1/2 tsp - lightly roasted fennel seeds
1/2 tsp - Red Chilli powder
1 tsp - Turmeric powder
1/2 tsp - Garam Masala
1 pinch of powdered black cardamom seeds
1 pinch - Asafoetida
1 tbsp Tomato Ketchup
Salt to taste
Oil for cooking
Chopped Coriander leaves and ginger julienne, for garnish

Steps to follow:-

1. Roughly pound coriander seeds and fennel seeds in a mortar & pestle.

NOTE: Just roughly pound. DO NOT make it a powder.

2. Heat oil in a wok and add asafoetida and cumin seeds. Let it splutter.
3. Gently crush kasuri methi between your palms and throw it in the oil.
4. Add green chillies, coriander seeds, fennel seeds, ginger garlic paste and saute for sometime over a low flame.
5. Add onion paste and bhuno till its goldenish brown in color.

NOTE: You could add a pinch of salt while sauteing the the onions as this quickens the 'bhunoing' process.

6. Add capsicum and onions saute
7. If the onion paste is sticking to the bottom of the pan, you could sprinkle some water intermittently to avoid the mixture from burning.
8. Keep sauteing for 2-3 mins and then add spices - Red Chilli, Turmeric and black cardamom powder.
9. Now add paneer cubes to the vegetable mix and saute with light hands ensuring paneer cubes do not break or crumble. Close the pan with a lid, leaving a small gap and let it cook for 5-7 minutes over a low flame.

Tip: You can keep the paneer cubes in warm water at the start of cooking. This will keep the paneer soft.

10. Mix in tomato puree and bhuno for another 7-8 mins. Let the tomato puree reduce in thickness and render the gravy a bit dry.
11. Finally add tomato ketchup and garam masala.
12. Sprinkle some chopped coriander leaves and ginger julienne.
13. Serve hot with lachcha parathas or naans.

Tuesday 11 November 2014

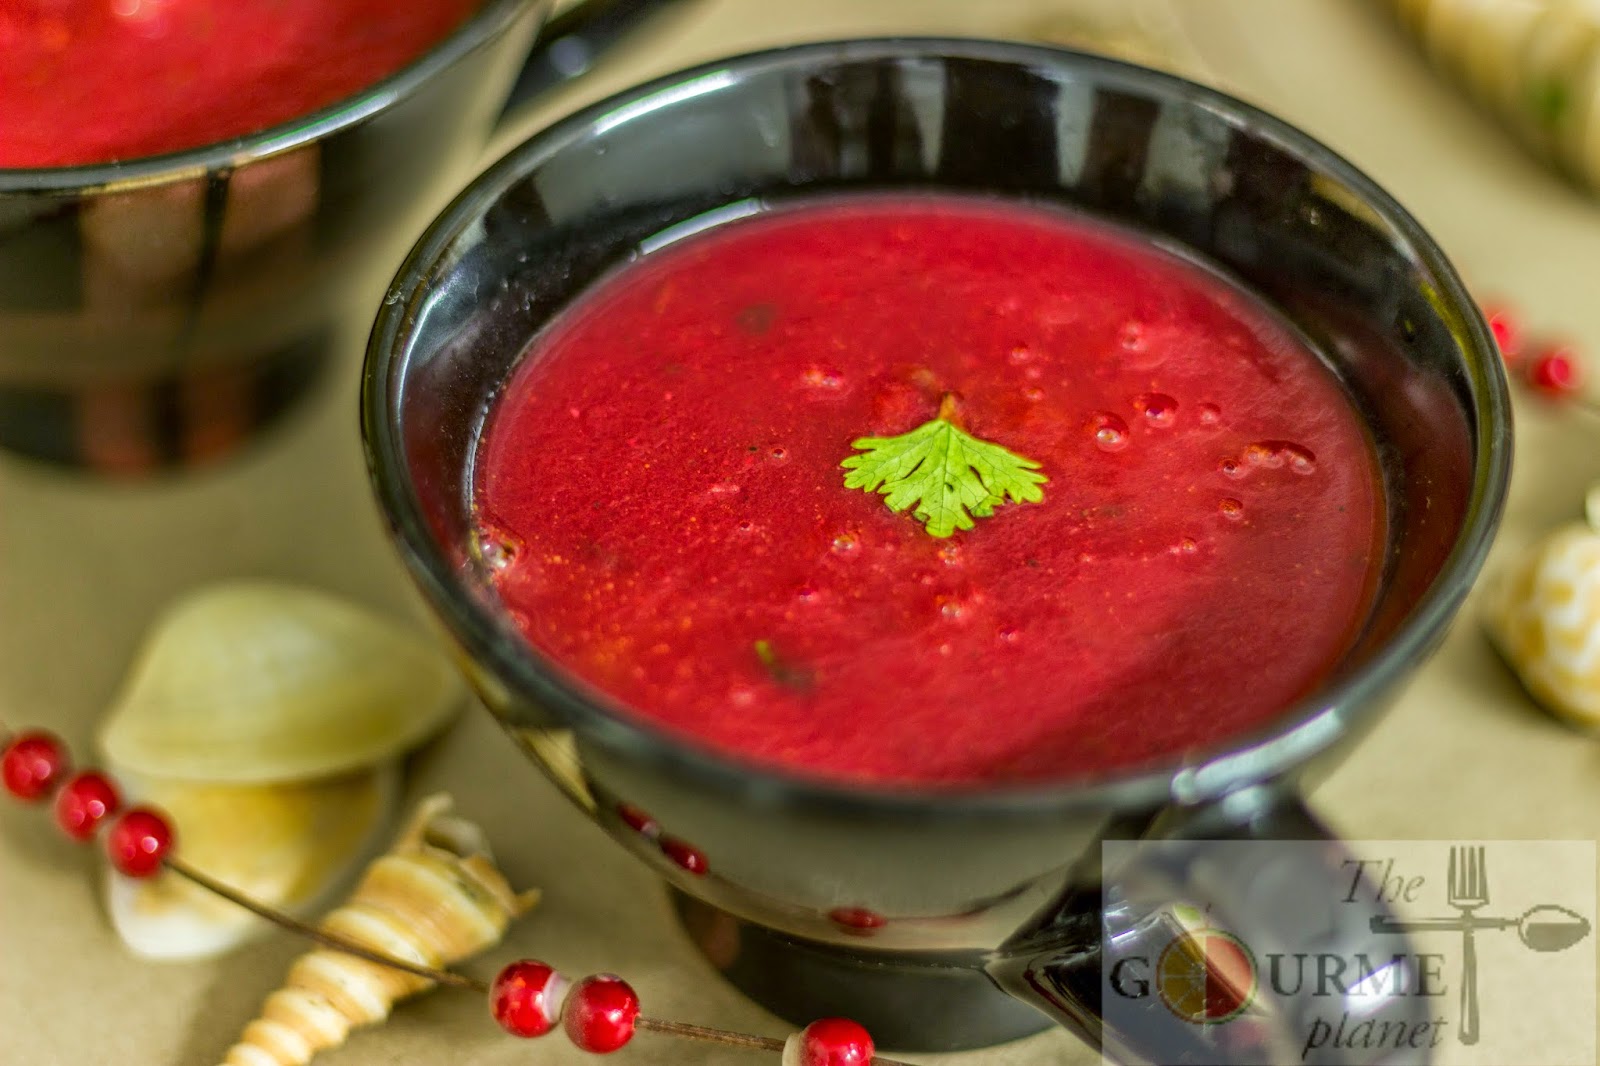
Tomato & Beetroot Soup...a healthy, zero cornflour version

Winter is officially here. It's the season of long nights and short days, of reflection and looking inward, and of thinking of ways to keep warm: scarves, gloves, fireplaces, cuddling... and warm food. Winter brings with it some icy, snowy, and gray days.  

At this point, you don’t want to do anything but stay in and curl up in a blanket with a nice bowl of warm food. Temperatures are dropping, which means that it’s the perfect time to heat things up with a warm bowl of soup. A piping hot bowl of soup is the ultimate comfort food during the winter months. Soup doesn’t have to be rich and creamy to be satisfying, though.

When I want to remedy that "cold to the bone" wintertime feeling, a delicious steaming bowl of soup before any meal often comes to my mind. Aaah! Soup...
Today i finally welcomed the approaching Winters in my home with my homemade winter warmth.This light, healthy broth has an absolute fuss-free recipe and is loaded with goodness of nutritious veggies! The sweet earthiness of the beet grounds the subtle notes of the tomatoes and carrots, adding depth without overpowering the flavor but renders a lovely valentine red color to the soup.

If the world seems cold to you, kindle fires to warm it with my version of "good-for-you" soup. This soup is brimming with beautiful colors and flavors that boost your immunities through the cold and flu season. 

A hearty bowl of warm soup on a cold day makes winter seem worth it, Isn't it?

Ingredients:-

For the Broth
5-6 Ripe tomatoes (cut in halves)
1 beet root (cut in halves)
4-5 Carrots (peeled and cut in halves)
1 inch peeled ginger knob (1 piece)
5-6 garlic cloves (big in size - peeled and whole)
1 Bay leaf
4-5 pepper corns
3-4 clove
Salt to taste
1/4 tsp sugar

For Tempering
1 tbsp butter
1 tsp cumin seeds
Chopped coriander (very finely chopped)

Steps to follow:-

1. Pressure cook all the items under 'For the Broth' with two cups of water up to 3 whistles (Simmer the flame to low after 1st whistle)
2. Pass the mixture through a seive and remove the bay leaf

NOTE: Do not throw away the water. You will need it in the last stage of cooking the soup.

3. Let the sieved vegetables cool down for sometime and then blend in a mixer. 
4. Strain this through a metal strainer to remove the seeds and any tomato skin left. 
5.  Add slight water if needed

NOTE: Use the same water which was sieved initially.

6. Heat a wok and add butter to it.
7. Throw in some cumin seeds and let it splutter
8. Pour in the soup and some coriander leaves and let it boil for 3-4 minutes. Boil until water and soup do not appear as separated in the mix.
9. Season generously with black pepper, adjust salt and add sugar.
10. Stir and give a final boil and transfer in individual soup mugs.
11. Garnish with coriander leaves and serve piping hot!

Savor this warm thin, light soup while snuggled under layers of cozy blankets. 
Have a comfortable winter night!
Good night. :)